Thursday, June 28, 2012

Sunny Days// Tribute to Lcpl Hogan

The Forecast for this weekend is suppose to be in the 100's.
*Cringing as I typed that.*
So I thought I would get into the spirit of the sun by re-vamping a table I had been neglecting.
I decided to step out of my grey color wheel {ha! grey & yellow the complete opposites in weather}
and broaden my horizons with a fun new color by Val spar!
While on one of my numerous Lowes Trips, I pretty much live there.
I some how ended up over at the paint sample wall for Valspar's new Summer colors.
This lovely little color was called Dreamy Caramel, but it definitely more of a yellow then a beige.
I would actually be pretty frightened if my caramel was this color...

Before:


The top had some pretty serious stuff stuck on it & tons of marks & scratches.
I'm not a big fan of the green & cherry combo.

After:


It was so fun working with a new color!
Once I put it on the table I was nervous to say the least.
But this pop of color is just what I wanted.


It is literally the perfect shade of yellow!
It isn't so in your face, it has a pale-esk essence to it.


I love the legs on this beauty!
I always feel so creepy saying that...but then I remind myself I'm talking about a table.
But then I think "wow, you actually sound insane"
Oh well. ;)


I love the classic lines mixed with the cute legs.
I'm not going to lie, when I first saw the table I didn't think it would come out so cute.
I was thinking it was a bit cartoonish/outdated.
But with a fresh new look it has completely changed my mind!


Another close up on the classic lines of this table.


I couldn't change the knob on this piece but I actually don't mind it. I think it fits the piece well, it makes it feel more neutral in a space with it all being one color.


I officially LOVE this color. I'm so glad Valspar had some pre-made paint samples or else I don't know that I would have chosen this lovely color!


This item is now for sale in my shop. 
Please check out my Shop Page at the top of my blog in the navigation bar for price & details.
Pick up is in Jacksonville, NC.


On another note though,
For those of you who aren't my friend on Facebook {link here};
Last Saturday a Very good friend of my Husband's and I was killed in combat overseas.
He was due home next month, to say this was a shock would be an understatement.
Plans had already begun for his homecoming, If any of you would like to send your condolences the Hogan Family has asked that instead of flowers or cards they would appreciate a donation to the
Hunter "HD" Hogan Memorial Rodeo Scholarship.
Hunter was big into Rodeo prior to the marine corps & served as his country as Infantry for the 1/8 battalion.
If you would like to donate the scholarship is set up through a bank account at Corner Stone Bank located in Nebraska, you can donate over the phone or find a nearby location or sister bank. {link here}
Thank you all from the bottom of our hearts to everyone for their continued prayers & support for the Hogan Family.

R.I.P. Lcpl Hogan.


Tuesday, June 19, 2012

Lovin' Numbers

Hey everyone! I hope you all are having a fantastic Tuesday.
Right now we are getting things ready for a party we are throwing this weekend for my Husbands 21st B-day!
It is going to be crazy town will all these Marines at my house, so I decided to take some time to finish up a few house projects I had been neglecting.
I had painters block {as I like to call it}
So I headed over to Pinterest for some inspiration for a dresser I had picked up for free.
Which is where I stumbled upon this picture on Pinterest:


{Dresser is from Anthro}
I loved the numbers and how much character it added to a normal little dresser.
Right then I decided my freebie needed numbers! 

Before:

It use to have stickers on it because it was in a little girls room.


This dresser needed A LOT of sanding.
A lot is even an understatement

In Progress:


I thought it would be fun to show an "in progress" picture, this dresser must have had many different lifes,
once I started sanding I saw so many fun colors underneath!
White, Grey, Beige, Green, ect.


& after I finished stripping the paint! 


the wood was in perfect condition so I couldn't just let it be painted!
So I opted to stain the top :)

Now for the fun stuff:
After:


Sorry for the lack of quality in the photos, this dresser found its new home in our bathroom upstairs where there is zero natural light.

I decided to give it a dark grey color to match the bathroom, & oil rubbed bronze hardware & numbers with a dark walnut stained top.


I love how much more storage this added to our bathroom!
We really needed a place to store our stuff and this dresser was the perfect size.
I love how much character this little piece has.


It looks like it belonged in the room all along.
I can't believe I didn't do this project sooner!
It has made getting ready in the mornings so much easier.


So what do you think?!
I for one am in love with dressers in bathrooms.
I think they are fun,
And add so much storage.
I highly suggest it if you have enough room in your bathroom ;)
Now I need to get some organizing done in my new drawers and cross off a few more projects on our to do list before the weekend comes!
Have a fantastic Wednesday.

xoxo
Jordyn Luise


Sunday, June 17, 2012

D.I.Y. Laundry Soap

As requested via Facebook!
I first found this lovely recipe over at LizMarieBlog,
And have since wanted to try it!
Last Wednesday I went by my local Wal-Mart to pick up stuff to make my own Laundry Detergent.
All the ingredients shown you can purchase for under 15 dollars!
Which doesn't sound like much of a deal now but it makes 2 gallons worth of soap,
the best part? You only need 2 table spoons.
This stuff is going to be a major money savor!
I don't know about you all but we go through A LOT of Laundry Soap in this household.
In large parts due to my husbands job,
I am not a fan of the smell of Jet Fuel haha!

This is what you will need:


All of these products can be found at Walmart.
Even that realllllllllly cute container ;)

Ingredients:
  1. Oxi Clean {One large container, One small}
  2. Arm & Hammer Super Washing Soda
  3. Borax
  4. Three Fels-Naptha Laundry Soap Bars (You can use any kind of soap you want here}
  5.  & Pure Baking Soda
  6. This part is optional but if you would like a certain scent you can add fabric softener to get any desired smell :)

What you will need:
  1. A cheese grader
  2. A large bucket
  3. A large bowl


This was actually really easy to make.
The hardest part was grading the bars of soap with a cheese grader.
That is when your handy dandy husband/significant other comes into play!


As you can see above, you just grate the soap like you would cheese and if it weren't for the smell of laundry you would actually think it is cheese haha!

Then grab your big bucket;


Take all the products I showed you above & dump them into the bucket.
Including your freshly graded laundry soap.
& then mix it all up!

YUP!
That is it!

I found this cute little container in the kitchen gadgets isle/canning isle at my Walmart.
& that little blue scooper is actually an Oxi Clean one which comes with the big container of the Oxi  Clean listed above.

I have used this for a few loads and it works just like any other laundry soap! Except you use way less.
Only 2 tablespoons! {or to the second line of the scooper}

I also wanted to let you guys know that this is perfect if you have sensitive skin, I do and it hasn't bothered me at all! I bought the Oxi Clean for sensitive skin {the green lid}
& this also works for HE washers.


I love how cute it looks though!
HA! I just called Laundry cute.


Here is a close up on what the mixture looks like.


If you have any questions feel free to comment or email me.
JordynPruitt@gmail.com

Try this and let me know what you think!! 
I am so excited I finally did it!
People have said before that this has lasted them up to a year!
Now you want to try it huh ;)

And Happy Fathers day! 
I hope you all have amazing plans with your dad.
I wish I was home to spend it with mine,
but that's military life for ya.
Have a great day and go do something fun!

xoxo
Jordynluise


Thursday, June 14, 2012

Two Toned Nightstand.

I think I have fallen hard for this new look.
I wanted to try something new with this nightstand I had for our guest bedroom.
I originally bought this lovely little nightstand from Ross.
But after a few years the paint didn't hold up so well.
When I started to sand it down I noticed that the wood was gorgeous once it was sanded down.
So this is what I came up with:

Before:


I loved the simplicity of the black but it was time for change.


Like I mentioned before it was pretty banged up from years of use.


But I love the shape of it! Don't you?!


After:


It turned out much better than I thought it would!
I love the look of the natural wood against the light grey & the original black pulls.


I loved the original pulls so I didn't change them.
I thought the black would tie in the bedding and other black metals in the room.
As well as this long shelf that we have spanning a whole wall with all our books on it.
I used the same stain on both so it all matches.


My favorite part is how different it looks.
You won't be seeing this type of look in stores ;)


What do you think?!
I love this little nightstand!
It is exactly what I needed to tie in all the different elements in the guest bedroom.

Today I bought ingredients to make D.I.Y. Laundry Soap.
I will be sharing it with you all either tonight or tomorrow so stay tuned for another new post!

Xoxo
Jordynluise


Monday, June 4, 2012

What we've been up too: Bathroom 2

So I went for it.
I actually chose a color.
Not grey, not white, no, Lavender!
I must say, I am sooo happy it isn't another grey room.
Although I actually had to convince my husband that we should do color not grey {ha! a man that has my <3} 
I love the light feel of grey but, the lavender has the same affect!
It was the perfect amount of color for the small space.
But I didn't want it to be too powerful so we balanced it with white.
What you say? "balanced with white?"
Instead of explaining I will just show you.

But wait!
It would be no fun having a reveal without Before pictures ;)
So here we go:

Before:


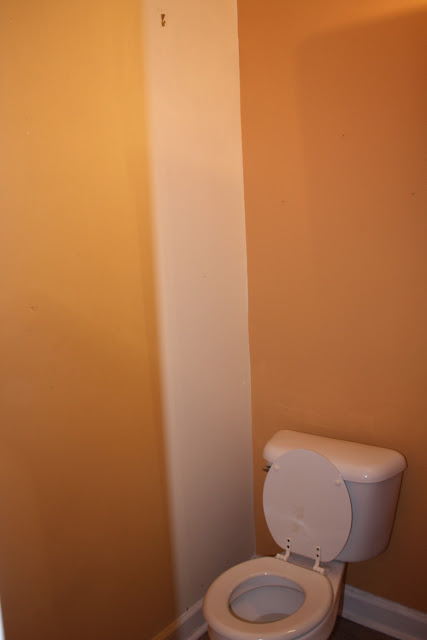
Did you have a heart attack after seeing that orange and oak wood?
No? Okay good.
{Gotta love those awkward pictures where you can see yourself.
Btw Hubby was clearrrrrrly amused. ;) }


If you are my friend on Facebook or any social media network I am on by now you probably know I am NO fan of two tone walls.
Well, I can handle it. In doses.
But not on every single wall of every single room in the ENTIRE house.
*cringe*


Is anyone else thinking Cream Sickle? 
I was SO ready to paint & demo that hideous oak mirror thing.
{by the way that wall that looks like it has a big white stripe is actually all white, whoops on my awesome photography skills}

So we did!
After:


Yuuuuuuuuuuuuuup.
Buh-bye Orange.
You will not be missed.


So this is what I meant by "balancing with white".
What do you think of the faux wainscoting?!


I loveee a minimalistic look so I didn't want to clutter the walls with tons of color,
I found these awesome pictures at Ross for $12.99 each!


We added a new light fixture since the ugly wood cabinet before had integrated lighting.
Just like the one in our other bathroom upstairs.


I snatched up these adorable hand towels at Target on sale!


Just like in our other bathroom I opted to just paint the cabinet white and spray paint the existing pulls.
This Rug was also found at Ross. For a whopping $12.99 as well.


Remember this little guy? He has finally found a place in our house!
Those awesome shaped round sides have an opening at the top {the surface opens on either side}
and is the perfect size to store our toilet paper in there! neat huh?!


So what do you think?!
It is a huggggggge improvement from the room before!
I still have a few things I want to do {welcome to the lovely side of having an interior design obsession, itneverends Sorry Hubbs!}
like some wall art on the wall that I did not picture 
{by the sink/door}
&& I have a few touch ups to make on the mirror
and we need to install our new faucet!
But other than that we are about done with this room, for now. ;)

I hope you guys enjoyed your weekend & your start to the week,
I for one am too excited for tomorrow
our air conditioning is FINALLY getting fixed after a month of a constant 80 -90 degree temp. in our house.
My poor Washington raised self has been depending on cold showers frequently during the day and a fan by me at all sides.

I have no Idea how people survive in heat like this without AC!
Not looking forward to the summer heat in the Carolina s that is for sure.


Also! Don't forget to spread the word about my lovely blog & Facebook page!
Once I get too 200 likes I will be hosting a give away!
Because lezzbereal everyone loves freebies!

xoxox
Jordynluise

Friday, June 1, 2012

Vanity Update

I'm Back!
I think it is fair to say that I am horrible at posting weekly haha!
Butttt, I am making it my new goal to at least post once or twice a week!

Remember awhile back when I posted about an antique vanity I picked up and re did in a cranberry color for my bedroom? 
Maybe this picture will jog your memory;


No? Well the Blog post can be found here.
Well I decided that the cranberry color wasn't quite right for the space.
So I decided to bust out my paint brush and try again!
&& I'm glad I did because I have fallen in love allll over again.


I love how it turned out! 
I haven't quite found a place to put it in our bedroom yet since we just upgraded to a King size bed but I already love it better than the cranberry color it once was.


I think the black will look great with our white & black antique dresser.
{Post & Picture For the Dresser here}


Don't you just adore the fact that you get some wood tone and a surprise with the red popping out?!
I love unexpected colors like that ;)


I think that the knobs go a lot better with this paint color rather than the cranberry color I painted it before. It doesn't feel like it's competing with the color.


<3 Sorry for the picture overload!


I decided to just spray paint the drawers a light grey color so it was easier to see in the drawers.


And here is another shot of the detail!.

This piece is now for sale in my shop!
To get pricing and info check out the "My Shop" Tab under my banner!


So what do you think? Do you like it better like this?
How was your memorial day?
I can't wait to hear from you!
If you have been up to any projects like them up to my facebook page here.

Also follow me on Pinterest and see what I pin!

xoxo
Jordynluise